Switches in RM2K
- meetthemeese

- Oct 30, 2020
- 5 min read
Updated: Oct 6, 2022
[WARNING: Image-heavy post]
We're going to get straight to the point right away in today's post - what are switches in RM2k? How are they useful?
This is going to be a fairly short post, so without further ado,

Switches
A switch is, as previously mentioned, kind of like a light switch. It is something that can either be on or off, which means that it can hold only 2 states as values. It can be set up in, and used from, inside an event (of any type).
Switches can be used to set up a fork-like scenario for events essentially - if switch A is ON, then do this and this with event XYZ, and if it's OFF, do something else. Remember the 'conditions' panel from the events dialog box (covered in the previous post)? Once you set up a switch, you can apply its state as a filter condition to decide which page of the event runs, or if the event even runs at all. The switch can also be used as a test condition for the fork command (I will be covering the fork condition and a few other common commands in detail in a later post).
Common scenarios for switches include finding items (i.e., treasure chests) and directing the flow of the gameplay - such as, Quest B won't be accessible to the player unless they've completed Quest A first; or if the player chooses to do XYZ in Sidequest A, then they get to explore Area C, but if they choose to do ABC instead, then the local WcDonaldinho's ice-cream machine will never break down for the player again. Distinct parts of your plot can be interconnected in this way by keeping track of the state of the appropriate switches.
Let's see how we can set up a switch. For the demo, I'm going use a switch that lets Chester find an item from the bucket next to his house. Then, I will also use the same switch as a filter condition for the NPC we created in the previous post, making it so that the ghost doesn't even appear on the map unless Chester finds the item first.
On the events layer, double click on the place where your character will find the item, to open up the events dialog. In my case, it's this bucket here -

I've configured this event to
Have 2 pages - one to hold the commands for the first time that Chester interacts with the bucket, and one to hold the commands for subsequent chicken-to-bucket interactions.
Be at the same level as the hero sprite and get triggered on click (both pages have these settings)
In Page 2 (the higher priority page, if you'll remember from this post on events), I will add the commands for what happens after Chester has clicked the bucket at least once already. We keep this as a higher priority page, because we need to ensure that once our switch is on, this page will always be run.

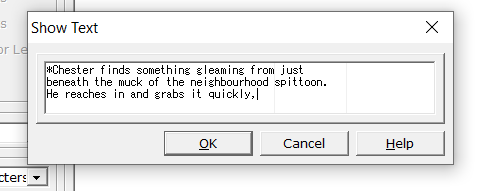
I'm just displaying some text here.
Now we move on to Page 1, where we'll add the commands for adding in the item the first time Chester clicks on the bucket. To add an item, click on the 'Change Items' command (tab 1, column 1). Choose your item and quantity in the dialog that opens up.

You can increase or decrease the item quantity, by a fixed number or a variable number (this is one of the places where variables come into play). You can also choose the item to be added via a variable. We'll be looking into variables in more detail in the next post.
My settings are configured to add 1 fixed weapon item.
Next, we will set a switch to the ON state to identify the fact that Chester has already taken the item out of the bucket once. This switch will let us then force the event to run Page 2 on all the subsequent times that Chester interacts with the bucket again.
Add the 'Control Switches' command (tab 1, column 1). The first panel we see let's us choose a switch, and the second panel let's us choose the switch's state. Toggle ON/OFF means that the switch will switch (haha) between the ON and OFF states every time the player interacts with the event.
Click on the button with the 3 little dots to open up another dialog.

This is where we create a switch. Simply select one of the empty rows on the right, give it a name on the bottom, and that's it! Switch created!

The ranges you see on the left just lead you to more switch slots that you can use. You can also increase or decrease the number of switches by clicking the 'Maximum Number' button at the bottom.
I've set it to ON, and my page is now done.
NOTE: Switch order matters a lot of the times. To be on the safe side, always turn ON or OFF your trigger switches at the end, after all the relevant commands. You'll know what I mean if you ever have a switch that triggers a parallel process event and it doesn't work. Just move the switch to the end.

DIGRESSION: Funny thing about text box messages in RM2K - you can't write more than 3 lines in the editor, and each line can have maybe 6-8 words before they start getting cut off from the screen during gameplay. So you'll need a bit of wonky formatting in your text message commands, like so -
I'm not sure if you can see the 2 faint grey lines in the text area above, but if you always keep your text on each line within the first grey line, you're safe.
Now, back to the event, we've set up a switch to exist in the ON state after the first time Chester interacts with the event. Now this switch can be used to force Page 2 of the event to run whenever he clicks on the bucket again. If we make sure we keep the switch always ON, then Page 2 will always run.
Add this switch as a condition in the event's condition panel for Page 2.

Save the event and run a quick test play to see if it works as expected.


Yay! We've successfully set up our very first loot event using a switch!
Ghostly Games
Now I'll make it so that my NPC doesn't appear on the map at all, until Chester finds the item first. We're going to see how we're able to use the same switch we set up to control 2 separate events.
Open up your NPC event and add the switch as a condition the same way we did above, save it, and see if your NPC turns up on the map or not until you interact with the item event.


A couple of end notes about switches -
As we saw, we could use the same switch to control 2 unconnected events. This means switches are independent entities and not tied to the event you first created them in. In fact, switches have global scope and can be used across maps as well.
Once you name a switch, it has been created. Once you re-name a switch, it's still the same switch, but with a different name. The system won't realise you've renamed it because it only looks at the number/ID of the switch (in my screenshots above, the ID was 0001.
Next post, we'll go over variables!
Until then,
- Count Meesles


Comments