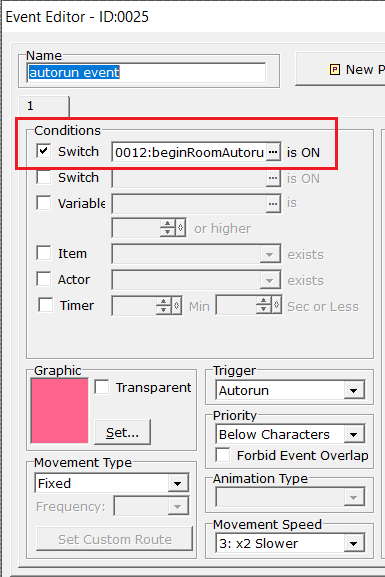
Autorun Events
- meetthemeese

- May 6, 2021
- 3 min read
Updated: Oct 6, 2022
Continuing from where we left off - in this post, we'll see how we can use autorun events to build cutscenes (i.e., scenes which play out a story for the player, usually without the player being able to interact with the game for the duration of the scene). An autorun event helps with this, because it forces all other events to stop running until it itself finishes running.

At the outset, I apologise to my 0 visitors for being MIA so frequently. To make up for this, here's some more of my terrible writing -
We introduce the clues now!
Here's a view of the room Fishface stays in. This is what I've decided to build - The main 'clue' regarding his whereabouts is contained in an event highlighted in green in the picture - a book, basically. The actual autorun event used for the cutscene is highlighted in yellow.
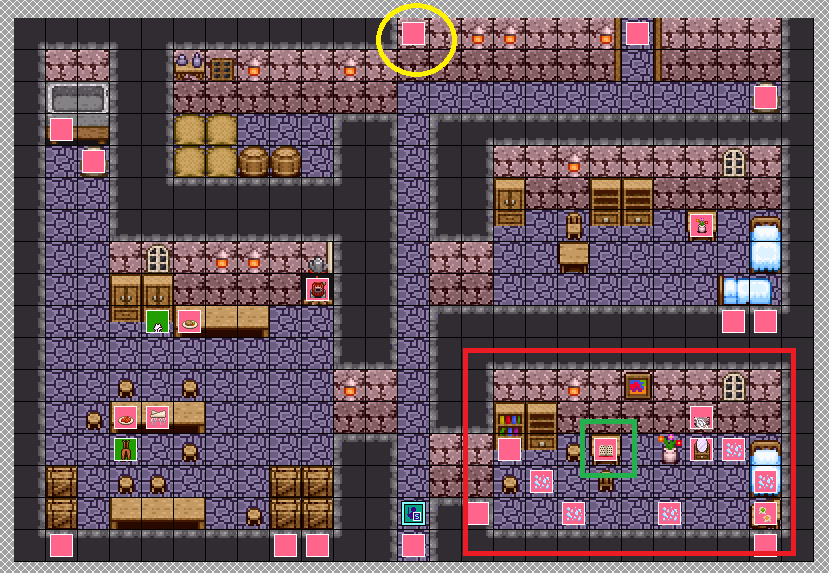
I'll explain in a bit why the 'clue' book itself isn't the autorun event. First, let's set up the interactions between Chester and the 'clue' book (or whatever it is you've used).
Here's a schematic of what'll really be happening here-

Once Chester clicks on the main clue, a switch called beginRoomAutorun is turned ON. This in turn triggers the cutscene event that is set to autorun already.

But why not make the clue book the autorun event? Huh? What've you got to say for yourself, HUH??
Now, we could use a new page in the book to set up our cutscene commands too (same settings for the new page - autorun trigger and switch condition - as what I've used for my cutscene event). However, when you create a cutscene, you usually have multiple characters and objects (and even data, possibly) being manipulated. In such a scenario, it's just cleaner and easier to maintain if your cutscene event (or events) is a separate event altogether, not associated with any specific object or other event on the map.
Okay.
Now we're done with the triggering of the cutscene, let's look at the actual cutscene event. We can place this event anywhere, really, so long as it doesn't interfere with, for example, player movement. I've placed it way up on a wall here that's unreachable by the player or any other event.

Here's a breakdown of the commands I've added. You're of course free to create and test (don't forget to test) any cutscene you want. I've made a simple scene where the narrator describes what is happening.

I wanted the player to be in front of the table when the scene gets triggered. But if you see my map, you can see that the book-clue is clickable from 3 directions - the front of the table and either side of the table. So the first few commands are simple fork commands that decide if the player needs to be moved to the front or not (depending on where they're clicking the book from).
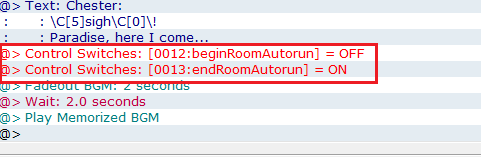
I've also used the Memorise BGM command because I change the BGM to something else while the cutscene plays, so that's why I'm just memorising the current BGM at the start of the event.
The second set of commands is just the narration, as that's what my cutscene is all about. You can do anything in your cutscene because you will be free to display whatever dialogues you want, move your events anywhere you want, without the risk of the player interrupting the scene in any way. This is because, as you may recall, autorun events block all other events on the page from processing. Not even the menu can be accessed (unless you have custom controls for menu access - even then, I'm not sure it would be accessible).

The final bit is the important one - we turn the triggering switch OFF (beginRoomAutorun), and turn ON another switch (endRoomAutorun). Turning the trigger switch OFF ensures the autorun event ends, while the second switch can now be used to alter the behaviour of different events on the page - including ensuring the 'clue' book doesn't end up triggering the autorun event again.
It can even be considered a turning point switch in our demo, which means, we can now update our Main Quest Log as before.
And that's how you start and end cutscenes!
For this demo, the main changes that occur now are -
A new area where our hero must explore next opens up
The quest book gets updated.
This new area will help us segue into the next main topic in this tutorial series - Monsters and Battles!
But for now, run a test playthrough and make sure all is well.


Until next time,
-Meesurugan's Dahi Vada Shoppe


Comments